Install GPU Support to TensorFlow on Windows
A detailed guide to make your GPU work for TensorFlow
 credit: unsplash
Preparation
Before the installation, we need to check the following things:
Check your CUDA®-enabled GPU card info
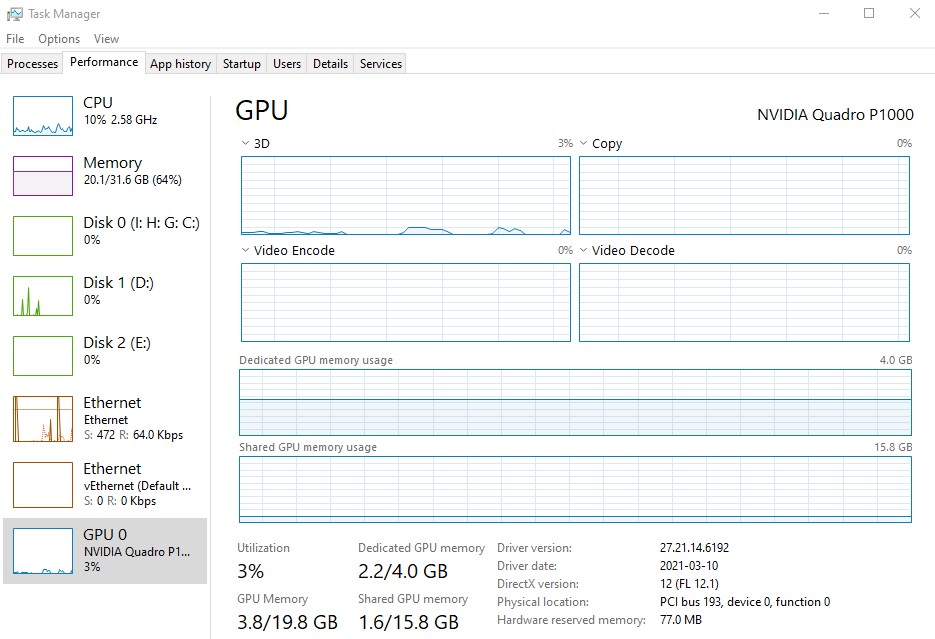
To check your computer’s video card info, just go to Task Manager by clicking Ctrl + Alt + Del. Don’t know how to do? Check here.
My card is an entry level card: NVIDIA Quadro P1000 with 4GB dedicated GPU memory.
You may also check the list of CUDA®-enabled GPU card here.
Check your Python version
In your command shell (Anaconda Powershell if you use Anaconda for Python), type python --version to show the version of your installed Python. As of Dec 2021, Tensorflow 2 supports Python 3.7 - 3.9. My Python version is from Anaconda which is 3.8.5.
Check your TensorFlow version
Type python -c "import tensorflow as tf;print(tf.__version__)" in your command shell and it should output the version number if you have installed the TensorFlow. Mine is 2.7.0.
Check the required CUDA and cuDNN version
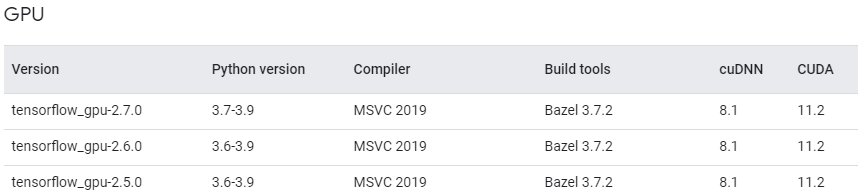
GPU support requires a CUDA®-enabled card. To drive the card, we need to install the CUDA drivers and the cuDNN libraries. The versions of CUDA and cuDNN must match with the version of TensorFlow, otherwise it won’t work. Check here for the version numbers.
As my TensorFlow is 2.7.0, the corresponding CUDA and cuDNN versions are 11.2 and 8.1, respectively. Take note of the version numbers as we need to use them later.
Install GPU Support
We need to install four software and a few checks to make GPU work on Windows.
- the Microsoft Visual C++ (MSVC) compiler
- the GPU video card driver
- the CUDA Toolkit
- the cuDNN libraries
Install the Microsoft Visual C++ (MSVC) compiler
This is relatively easier. Just go to the Microsoft website and download the Visual Studio 2019 or newer version (as of Dec 2021, it is version 2022).
Visual Studio is a very powerful Integrated Development Environment (IDE) for programmers. You may not use it but it comes with the C++ compiler which is required to drive the GPU support.
Install the GPU video card driver
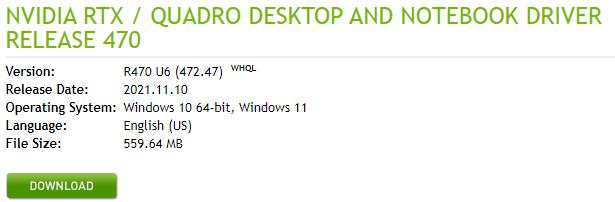
Go to NVIDIA’s download website and download the driver for your video card. The file size is more than 500MB, so it may take a few seconds. After download the driver file, just follow the screen instructions to install the driver for your card.
Install the CUDA Toolkit
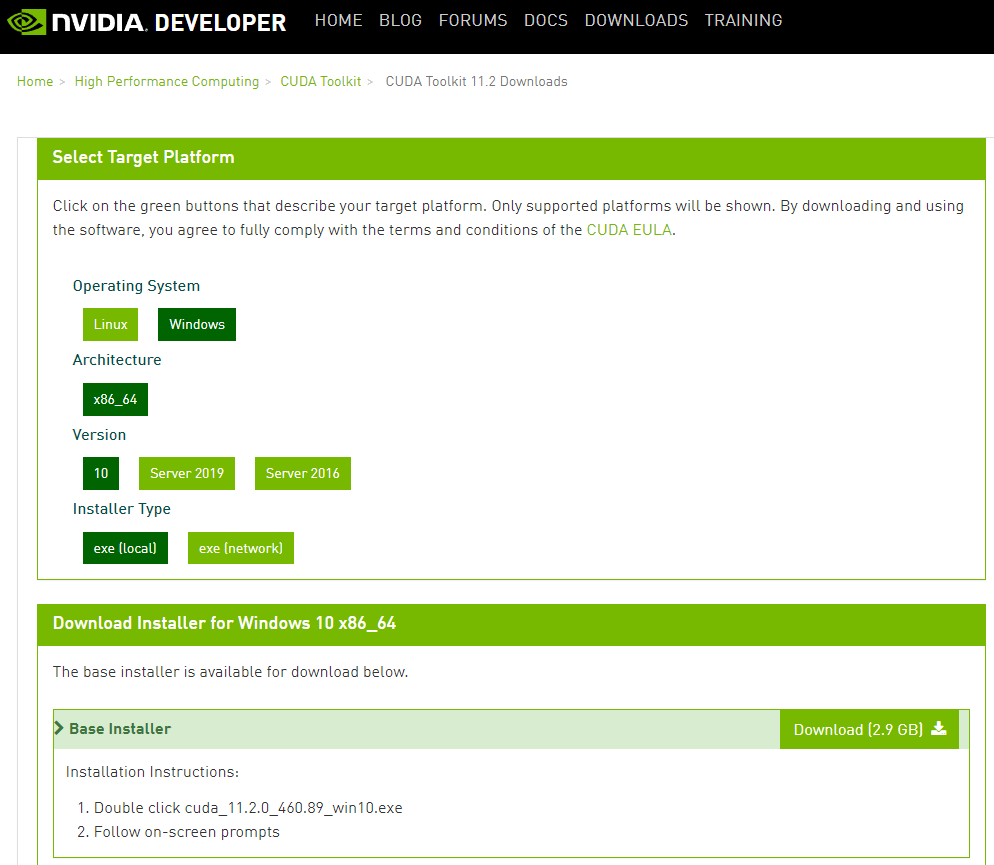
Navigate to the CUDA supporting website and download the CUDA Toolkit for your system. It is a must that you download the version which supports your Python and TensorFlow versions. Don’t click “Download Latest CUDA Toolkit” as it typically will not give the right version for your system. As of Dec 2021, TensorFlow only supports CUDA 11.2 or older version.

I am using the 11.2.0 version and I think it should be fine for 11.2.1 and 11.2.2 as they are minor upgrade to the 11.2 version.
And the file is huge (2.8GB), so take a break.
According to Wikipedia, CUDA (or Compute Unified Device Architecture) is a parallel computing platform and application programming interface (API) that allows software to use certain types of graphics processing unit (GPU) for general purpose processing – an approach called general-purpose computing on GPUs (GPGPU). CUDA is a software layer that gives direct access to the GPU’s virtual instruction set and parallel computational elements, for the execution of compute kernels.
So after installation of CUDA Toolkit, we need to verify that the CUDA software platform is able to talk with the GPU hardware. This is vital, otherwise we cannot use the GPU for computing. You may skip this step but I highly recommend you do so before going to the next step.
Before the verification, we need to copy all files in C:\Program Files\NVIDIA GPU Computing Toolkit\CUDA\v11.2\extras\visual_studio_integration\MSBuildExtensions to C:\Program Files (x86)\Microsoft Visual Studio\2019\Community\MSBuild\Microsoft\VC\v160\BuildCustomizations.
We perform the following steps to verify the CUDA installation:
- Go to
C:\ProgramData\NVIDIA Corporation\CUDA Samples\v11.2and compile some sample source files for testing of CUDA. All samples are in source format and we need to use Visual Studio to compile/build into an execuatable file (.exe). We recommend1_Utilities\deviceQuery.
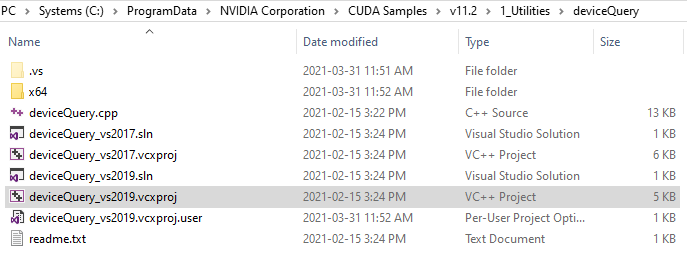
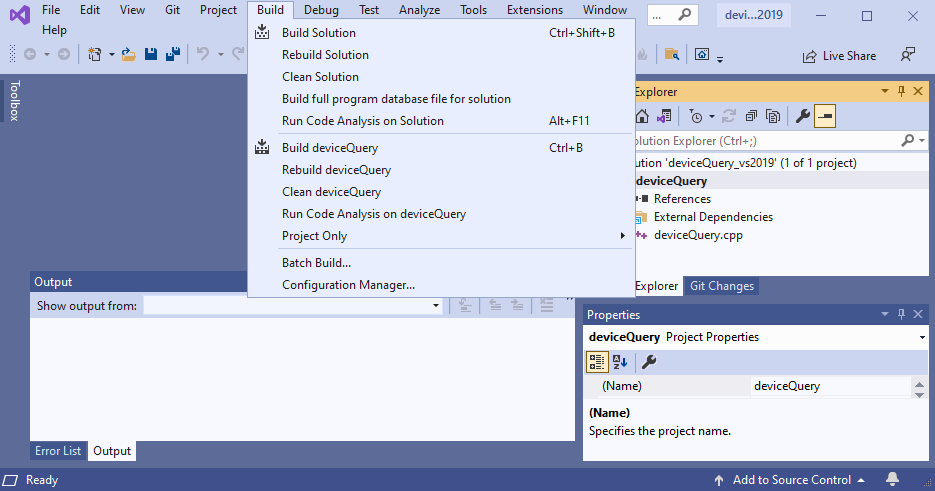
- For Visual Studio 2019, double click
deviceQuery_vs2019.vcxprojand then “build” it under VS2019. It will create a.exefile automatically underC:\ProgramData\NVIDIA Corporation\CUDA Samples\v11.2\bin\win64\Debug\deviceQuery.exe.
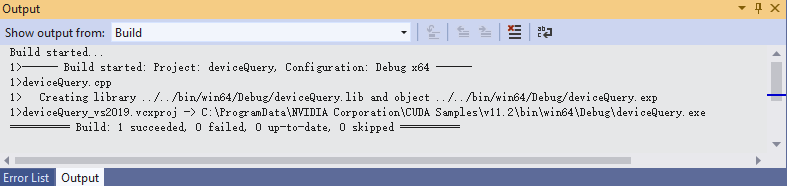
After build completion, it should report the following output:
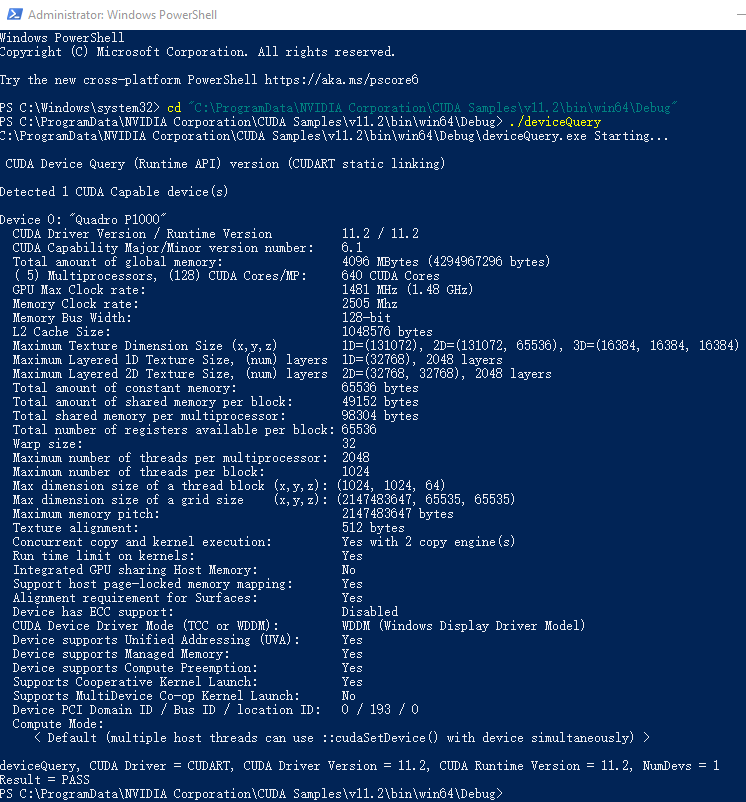
- In your command shell, move to the folder
C:\ProgramData\NVIDIA Corporation\CUDA Samples\v11.2\bin\win64\Debugand run./deviceQuery, it will tell you whether the CUDA works. The following shows the output of my Quadro P1000 card.
Install the cuDNN libraries
The last step is to install the cuDNN libraries. The NVIDIA CUDA® Deep Neural Network library (cuDNN) is a GPU-accelerated library of primitives for deep neural networks. cuDNN provides highly tuned implementations for standard routines such as forward and backward convolution, pooling, normalization, and activation layers.
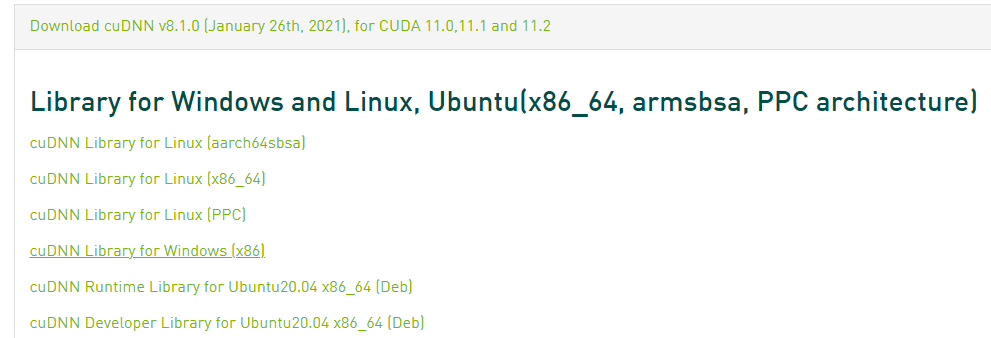
Navigate to the NVIDIA developer website, register an account, and then download the correct version (8.1 for my case). Don’t download the most recent default version. Click “Archived cuDNN Releases” and choose the right version which will match with the CUDA, Python and TensorFlow versions. The file size is more than 600MB.
After download, unzip the file and copy the following files into the CUDA Toolkit directory.
- Copy
\cuda\bin\cudnn*.dlltoC:\Program Files\NVIDIA GPU Computing Toolkit\CUDA\v11.2\bin. - Copy
\cuda\include\cudnn*.htoC:\Program Files\NVIDIA GPU Computing Toolkit\CUDA\v11.2\include. - Copy
\cuda\lib\x64\cudnn*.libtoC:\Program Files\NVIDIA GPU Computing Toolkit\CUDA\v11.2\lib\x64.
Or just copy all the folders and files under cuda to the folder C:\Program Files\NVIDIA GPU Computing Toolkit\CUDA\v11.2.
The last and very important step
The last and very important step is to add the CUDA library folder to the system path, and then TensorFlow can automatically open the libraries according to the path folder.
In the command shell, go back to the folder C:\Windows\system32 and then run ./control sysdm.cpl command, it will launch the System Properties setting page.

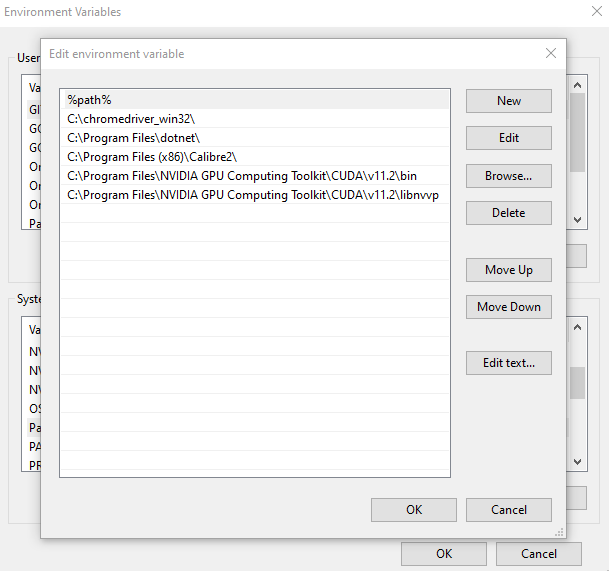
Select the Advanced tab at the top of the window and then click Environment Variables at the bottom of the window. Under “System variables”, double click “Path” variable and make sure the following two are present (if not, click “New” to add them):
C:\Program Files\NVIDIA GPU Computing Toolkit\CUDA\v11.2\bin
C:\Program Files\NVIDIA GPU Computing Toolkit\CUDA\v11.2\libnvvp
DONE!
To check whether TensorFlow has access to the GPU support, open Python console (through Anaconda Powershell Prompt for my case), and then run the following code one line at a time:
import tensorflow as tf: launch the TensorFlowprint(tf.test.is_built_with_cuda()): Returns whether TensorFlow was built with CUDA (GPU) support.Trueif CUDA is installed properly.print(tf.config.list_physical_devices('GPU')): Return a list of physical GPU devices visible to the TensoFlow. The output will show all physical GUP devices, starting from index 0.
Alternatively, run the following code directly in the command shell:
python -c "import tensorflow as tf;print(tf.test.is_built_with_cuda());print(tf.config.list_physical_devices('GPU'))"
The output is as follows:

Done and enjoy the GPU computing. Leave a comment below if you find this guide useful.
This guide is prepared for students at Singapore Management University, Master of Professional Accounting, Master of Science in Accounting (Data & Analytics) who are learning data analytics under me.
Last updated on 11 December, 2021
Wang Jiwei
Associate Professor
My current research/teaching interests include digital transformation and data analytics in accounting.